 An important part of the arts festival experience is learning from other artists about booth displays. At a recent fine arts fe
 stival I saw how artists shared how to display art in your home or office. I wrote about that in a previous blog which I called “Interior Design with Art Quilts”. At this same festival I observed many artists who sat or stood (I can’t stand a whole day so sitting in a director’s chair is a must) behind a pedestal like table similar to a lectern but with a flat top, not slanted as with most lecterns. Most of these tables cost around $200 or more….too much for this artist on a budget. But my husband and I decided it was time for another wood project. We made ours for less than $50.
We created a knock down pedestal table which is about 41″H and 17″ x 23″ on top. I designed the size to fit my bin of tube boxes I use for packaging purchases in addition to a small shelf just below the top for my business transaction supplies. For the last 3 years I have been using a lightweight 2′ x 4′ table with expandable legs (for the extra height) but the foot print of that table reduced my display space in the canopy. And I did not need that much space hidden under a table for festival supplies, especially not since I have my new rack this year to hang quilts not on display (which last year were in bins under the table). I have two more festivals this year and plan to locate my new pedestal table and my director’s chair in a front corner, possibly out under the f ront
ront  canopy so that all my booth walls can be used for display and none are blocked out for my chair and “business” table. I will try this new table at my two last festivals: Eagles Mere- PA (August 8-9) and Arts in the Garden – Canandaigua, NY (August 15-16).
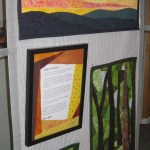
I have also added a 3′ wide extra wall which I use in the front of my canopy.  I am learning it is important to have information about yourself really OUT THERE for easy reading by potential customers. This 3′ wall is on the front of my booth and an excellent place to put a few quilts and my framed “Information about the Artist”. People can read and get a sample of my art before entering the booth. Hopefully I will capture a few more potential customers!
Lastly I’m going to try a new way to display price tags. Until now I have paper clipped my prices to the lower right corner of each quilt. The tags are nicely printed on my computer but I haven’t been happy with the way it looks as no matter how well I clip them, the prices still kind of detract from the quilt. I’m going to try hanging the prices beside the quilts. With mesh walls I can’t use tape so I’m either using drapery hooks or my cut paper clips, both of which hook into the mesh wall and give me a good metal loop upon which to hang the price tag.
My goal is a professional looking booth with easy viewing for customers and hopefully lots of sales!
